Evaluating the slmdemo Program (Windows Only)
slmdemo is a Windows-based graphical sample program to show basic API functions. Evaluate it using the steps described here to understand the basic API calls.
Step 1 - Launching slmdemo
In this example, we will use the slmdemo application installed at the following path: <installdir>\redistributable\tools
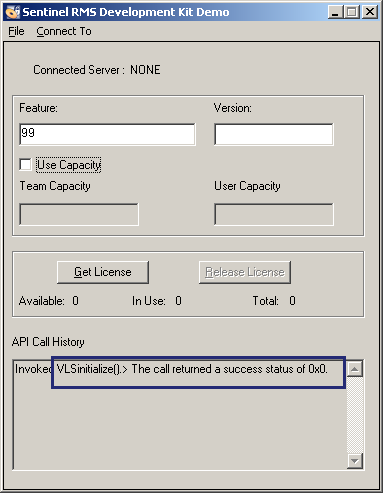
Double click the executable to launch it. slmdemo calls the VLSinitialize API call when the application is invoked successfully.
Step 2- Set the Contact Server
Set the contact server (License Manager) under the Connect To > Server menu option. In the screenshot below, we set it to no-net. This represents "no network" or the standalone licensing environment. In this case, the license file lservrc located in the same folder as slmdemo is used.
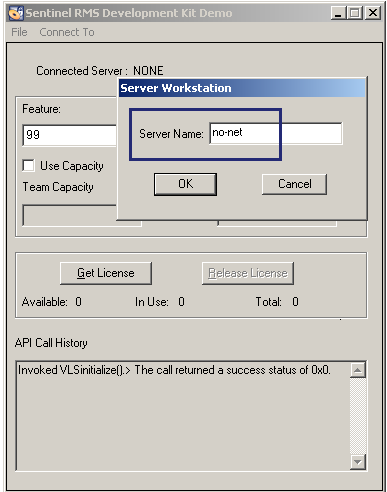
NOTE Set the contact server to localhost when the License Manager on the local system is to be used for hosting the licenses. In this case, the license file lservrc is located at: <rootdir>:\Program Files\Common Files\Thales\Sentinel RMS License Manager\WinNT is used.
Step 3 - Specify Feature Name and Version
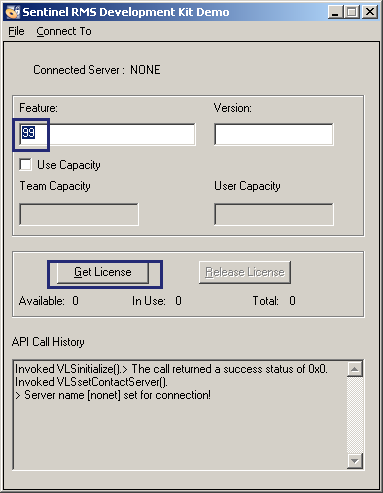
Generate a license with features name "99".

We continue with the default feature "99" that does not have an associated version. You may choose to specify any other feature and version combination as specified in the license file.
Step 4 - Obtain License
After specifying the feature and version, click the Get License button (highlighted in the screenshot above).
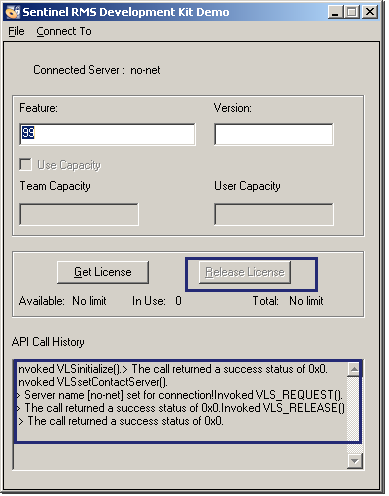
The API Call History (below) displays the LSRequest API return status as success. Also, the in-use license token count changes from 0 to 1.

Step 5 - Release License
Click the Release License button to release the license using the LSRelease API call.
Step 6 - Cleanup Operation
When the slmdemo application is exited, VLScleanup API is called.
